
Avoid Warping and Cracks with Proper Butcher Block Installation
Understanding Wood Movement and Material Selection
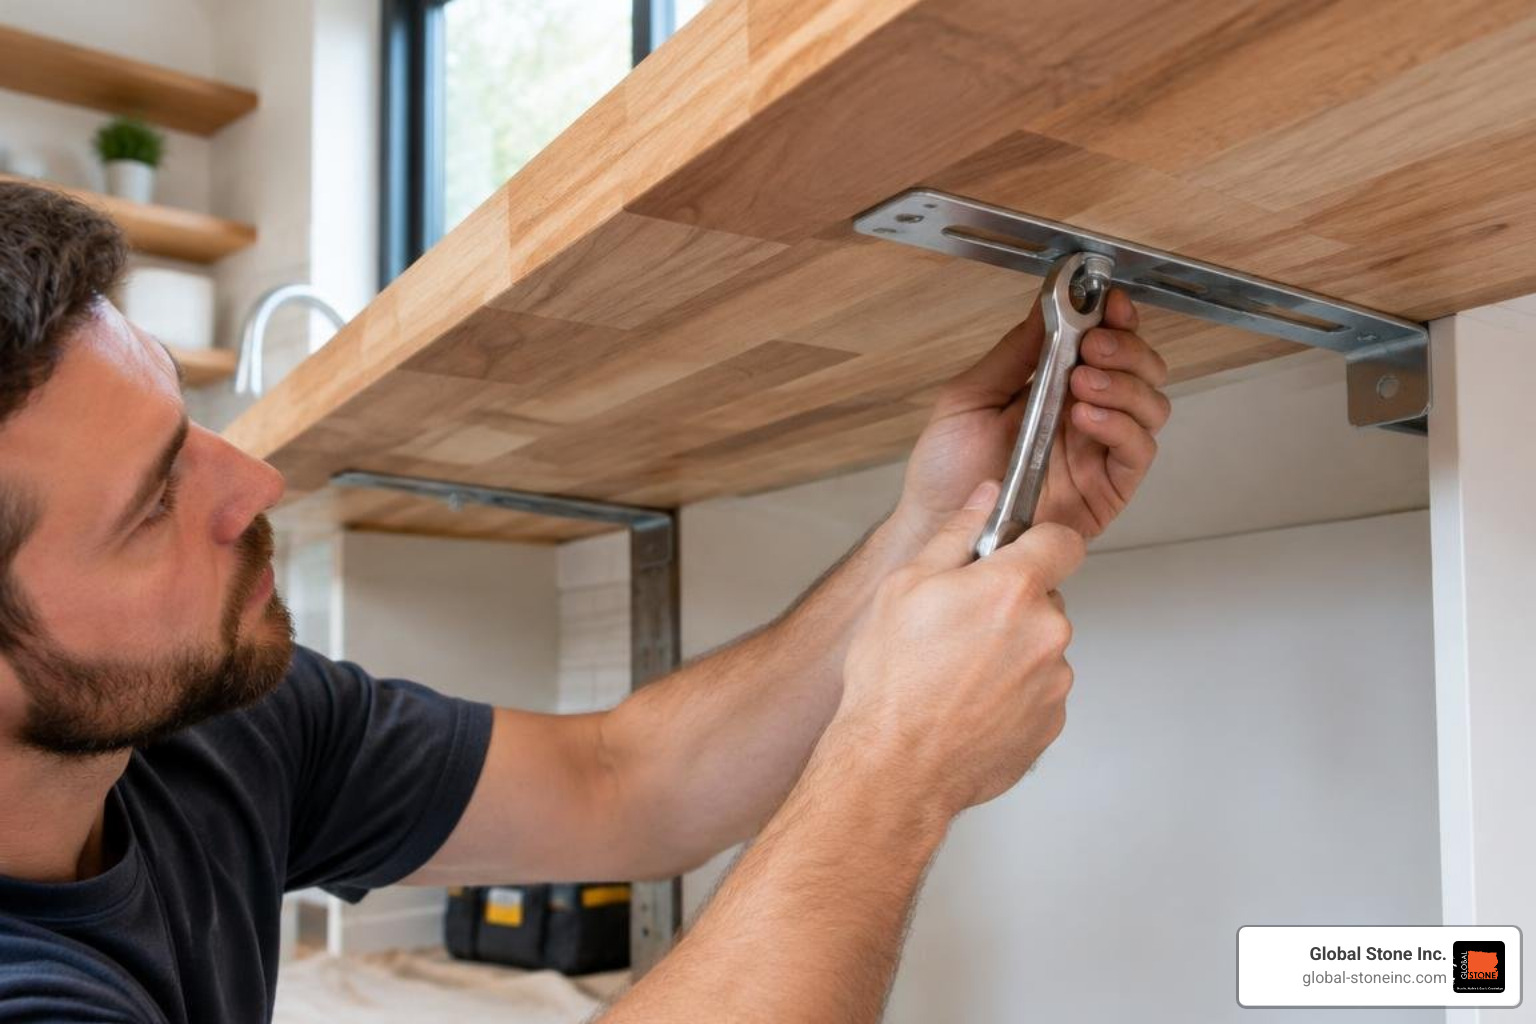
Proper butcher block installation prevents warping and cracks by letting the wood move naturally. Acclimate the slab in the kitchen for at least 72 hours, seal all six faces evenly, leave a 1/8 to 1/4 inch expansion gap at walls, and secure the top with slotted brackets, Z-clips, or figure-eight fasteners rather than rigid screws or glue. These steps allow seasonal expansion and contraction without cupping, splitting, or pulling cabinet face frames apart.
Wood is a living material that never stops breathing. Unlike engineered stone or solid surfaces, natural hardwood swells when it absorbs moisture and shrinks as the air dries out. According to data from the American Wood Council (AWC), standard construction hardwoods expand or contract between 0.1% and 0.2% for every 1% change in moisture content.
Across a standard 25-inch-wide kitchen countertop, a hard maple slab can expand and contract by 1/4 to 3/8 inch across its width between a muggy summer and a dry winter. If you fight this movement by screwing the slab down rigidly, the wood will cup, split, or blow apart cabinet face frames.
Selecting the right hardwood species determines how well your kitchen surface handles daily wear and seasonal moisture shifts. Hardness is measured via the Janka scale, which records the pounds of force (lbf) needed to embed a 0.444-inch steel ball halfway into the timber.
- Hard Rock Maple (1,450 lbf): The gold standard for culinary surfaces. Its ultra-dense closed grain resists bacteria, takes finishes uniformly, and withstands heavy chopping.
- White Oak (1,360 lbf): Exceptionally stable with natural water-resistant tannins, making it a favorite for modern two-tone kitchen aesthetics.
- Black Walnut (1,010 lbf): Rich in color and slightly softer, meaning it is gentle on fine cutlery and forgiving on dropped glassware.
- Cherry (950 lbf): Offers smooth working characteristics and patinas into a deep, warm reddish-brown over time.
Edge-Grain vs. End-Grain Stability
The way timber strips are arranged within a butcher block directly impacts its structural integrity, knife friendliness, and load-bearing properties.
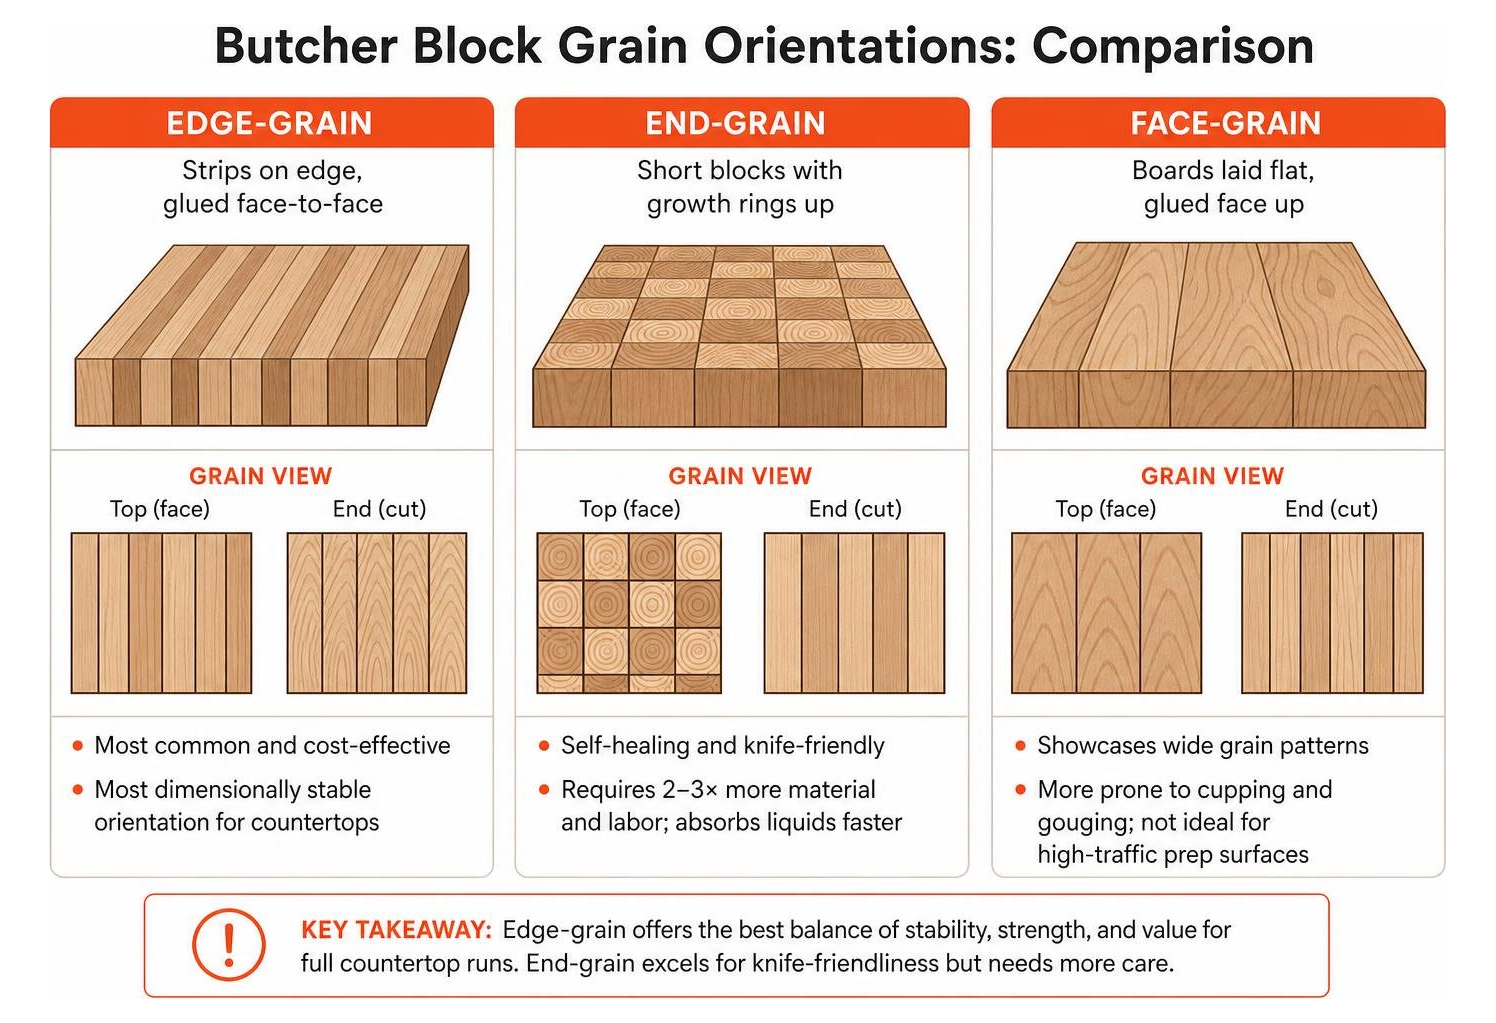
- Edge-Grain: Constructed by placing long, narrow lumber planks on edge and laminating them face-to-face. This is the most common, cost-effective, and dimensionally stable orientation for full countertop runs. The continuous longitudinal fibers provide immense spanning strength, supporting up to 500 pounds per square foot when properly braced according to AWC structural load guidelines.
- End-Grain: Built by arranging short vertical wood blocks with the growth rings pointing upward, resembling a chessboard. While end-grain surfaces are self-healing (knife blades slide between fibers rather than severing them), they require two to three times more material and labor. End-grain blocks also absorb liquids through capillary action significantly faster, requiring rigorous sealing.
- Face-Grain: Made by gluing boards flat side up. While it showcases wide, striking grain patterns, face-grain is far more prone to cupping and gouging, making it unsuited for high-traffic food-prep counters.
| Wood Species | Janka Hardness (lbf) | Annual Width Movement (25″ Slab) | Kitchen Zone Suitability | Relative Cost |
|---|---|---|---|---|
| Hard Rock Maple | 1,450 | 1/4″ to 3/8″ | Heavy prep, Islands, Sinks | Moderate |
| White Oak | 1,360 | 1/4″ to 5/16″ | Sinks, Perimeter Runs | Moderate to High |
| Black Walnut | 1,010 | 3/16″ to 5/16″ | Islands, Dining Bars | High |
| Cherry | 950 | 1/4″ to 3/8″ | Low-moisture Prep, Accents | High |
Full Countertops vs. Built-In Prep Inserts
Deciding between a full butcher block installation and an integrated cutting insert depends on your cooking habits and lifestyle:
- Full Butcher Block Countertops: Bring organic warmth to entire perimeter runs or expansive central islands. They create a quiet, tactile workspace. However, they require consistent oiling or finish renewals and require deliberate detailing around plumbing fixtures.
- Butcher Block Inserts: Involve dropping a specialized end-grain or edge-grain wooden prep section directly into an opening cut into a granite or quartz surface. This hybrid layout gives you a heavy-duty chopping station right beside the range or prep sink while keeping the surrounding high-splash zones protected by non-porous stone. When templating an insert inside stone cutouts, you must maintain an expansion perimeter gap of at least 1/8 inch sealed with flexible silicone to stop the swelling wood from cracking the surrounding slab.
Step-by-Step Guide to Installing Butcher Block Countertops
Fitting a hardwood surface demands clean joinery and thoughtful structural allowances. Walls are rarely square, and cabinet runs are rarely level, meaning precision templating is essential.
Essential Tools and Acclimation Before Installing Butcher Block
Never rush a wooden slab straight from delivery into service. Bring the butcher block into the kitchen and let it rest for at least 72 hours—ideally up to a week in humid conditions. Elevate the slab on 2×4 scrap blocks spaced evenly along the floor to allow air to circulate freely around both sides. This balances the equilibrium moisture content (EMC) to the room’s ambient climate (typically 6% to 8% internal moisture).
Before getting started, make sure you have:
- Circular saw or track saw with a fine-tooth carbide blade (40+ teeth)
- Heavy-duty power drill and driver bits
- Random orbital sander with 80-, 120-, 180-, and 220-grit sanding discs
- Scribing tool or compass
- Jigsaw with clean-cutting wood blades
- Level and carpenter’s straightedge
- Thin cardboard strips and hot glue gun (for making templates)
- Slotted cabinet brackets, Z-clips, or figure-eight fasteners
- #10 pan-head wood screws and flat washers
- Food-grade mineral oil, hard-wax oil, or penetrating varnish
For more detailed technical guidelines on environmental prep, explore these moisture control guidelines for installing butcher block countertops.

Cutting, Routing Seams, and Making Sink Cutouts
- Templating: Hot-glue thin cardboard strips along your cabinet tops, pushing them tight to the back wall. Scribe any wall bows or uneven plaster directly onto the template. Transfer these lines to the butcher block surface using painter’s tape to prevent edge splintering.
- Straight Cuts: Clamp a rigid straightedge guide or run a track saw with a fine-tooth blade. Score the top grain with a light 1/16-inch reverse pass, then make your primary through-cut. This prevents chip-out on expensive wood faces.
- Corner Seams: When joining two slabs at an L-corner, use a butt joint rather than a 45-degree miter. Mitering forces cross-grain movement against end-grain, which will pull the corner open seasonally. Rout pockets into the underside for miter bolts (tite-joint fasteners) and insert wood biscuits or Domino tenons along the seam for vertical alignment. Apply waterproof wood glue along the top half of the joint, pull the bolts snug, and scrape off glue squeeze-out after 20 minutes.
Sink and Appliance Cutouts: Drop-in (top-mount) sinks are preferred for wood surfaces because the rim protects vulnerable cut edges from direct moisture. If you prefer an undermount basin, cut the opening, radius all four inner corners to at least 1/2-inch to distribute tension, and sand the rim silk-smooth.
Cutout Protection & Appliance Shielding: Freshly cut end grain absorbs water 20% faster than long grain. Saturate all cutout edges with three to four coats of penetrating finish before dropping in the sink. Additionally, install a thin aluminum or foil moisture barrier on the underside of the countertop directly over the dishwasher to deflect hot steam cycles.
Fastening Methods That Allow Natural Expansion
Never glue a butcher block directly to base cabinets or screw through solid corner blocks without expansion slots.
To secure the top while letting it float naturally:
- Drill oversized 3/8-inch expansion holes through the cabinet corner braces.
- Drive #10 pan-head screws upward through the center of these oversized holes into the underside of the wood, inserting a broad flat washer between the screw head and the cabinet frame. Penetrate roughly half the thickness of the block.
- Alternatively, install steel slotted brackets, Z-clips, or figure-eight desktop fasteners.
- Hand-tighten all screws until they sit snug against the washers, then back them off one-quarter turn. The washer should still slide under firm thumb pressure, allowing the slab to glide laterally across the cabinet frame as indoor humidity shifts.
- Maintain an expansion gap of 1/8 to 1/4 inch between the wood edge and the finished drywall. Cover this gap with a tile backsplash or wooden scribe molding attached strictly to the wall—not the countertop.
For additional insight into standard wood countertop installation practices, review How to Install Butcher Block Countertops – Bob Vila.
Choosing the Right Protective Finish by Kitchen Zone
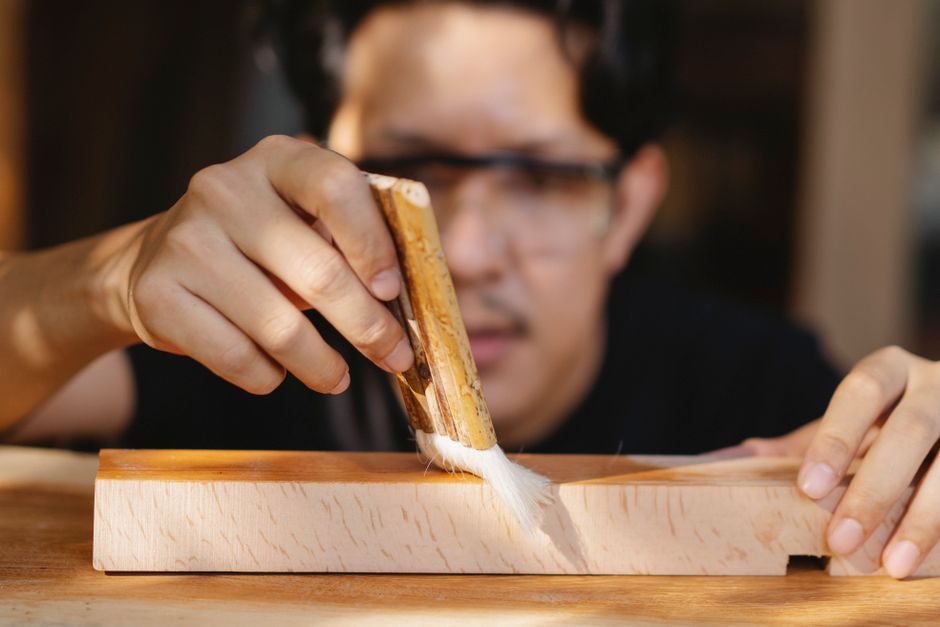
The right finish balances food safety, water protection, and maintenance demands. Different areas of your kitchen experience different levels of wear and tear, so choosing the proper treatment is essential.
| Finish Type | Food-Safe for Direct Chopping? | Water & Stain Resistance | Reapplication Interval | Best Kitchen Zone |
|---|---|---|---|---|
| Pure Mineral Oil & Beeswax | Yes (100% Non-toxic) | Low to Moderate (Beads briefly) | Every 3 to 4 weeks | Dedicated Chopping Islands, Baking Stations |
| Hard-Wax Oil (e.g., Osmo, Rubio) | Yes (When fully cured) | High (Resists wine, coffee, spills) | Every 1 to 2 years | General Worktops, Dining Overhangs |
| Penetrating Oil-Varnish (e.g., Waterlox) | Cured surface safe; not for heavy chopping | Very High (Withstands standing water) | Every 3 to 5 years | Perimeter Sinks, Wet Bars, Dishwasher Runs |
| Film-Forming Polyurethane | No (Chips into food; traps trapped moisture) | Moderate (Prone to milky water rings) | Strip & reapply upon failure | Not Recommended for Solid Wood Worktops |
Avoid standard film-forming polyurethane on kitchen wood surfaces. As the wood flexes through seasonal cycles, rigid topcoats micro-crack, allowing moisture to slip beneath the plastic film. This traps water against the raw grain, causing dark rot and peeling that can only be resolved by stripping the entire surface down to bare wood.
Maintenance, Repairs, and Troubleshooting Common Failures
A well-maintained hardwood surface easily lasts 20 to 30 years, developing a rich patina with age.
Mistakes to Avoid When Installing Butcher Block on Islands and Cabinets
Most butcher block failures happen within the first six months due to a few common installation errors. Check these pitfalls before completing your installation:
- Skipping Underside Sealing: Applying finish solely to the top side creates a moisture imbalance. The unprotected underside absorbs ambient cabinet moisture, causing the top surface to cup upward. Always apply equal coats of finish to all six faces.
- Over-Tightening Anchor Screws: Driving screws completely tight into non-slotted holes locks the wood in place, causing the top to split right down the glue seams during winter dry spells.
- Neglecting Overhang Supports: Overhangs larger than 8 inches perpendicular to the wood grain, or 12 inches parallel to the grain, require heavy-duty steel support brackets spaced every 24 inches to prevent sagging and splitting.
- Direct Heat Exposure: Installing a wooden slab tight against an uninsulated slide-in range or oven wall will dry out the glue joints, causing localized cracking. Maintain a 1/4-inch air space and use heat-reflective insulation tape along appliance-facing sides.
For additional DIY guidance, read through A DIY Homeowner’s Guide: How to Install Your Butcher Block Countertop – Agendacoverlife.
Diagnosing Cupping, Gaps, and Refinishing Surface Damage
- Cupping (Warping Across the Width): If the center of the slab sinks or the edges lift, the wood is suffering from uneven moisture exposure. Check whether the underside was left unfinished or if hot dishwasher steam is venting against the bottom. In many cases, loosening over-tight fasteners, setting up a dehumidifier, and applying finish to the raw underside will allow the wood to return to flat over several weeks.
- Removing Black Water Stains: Dark spots around faucets are usually iron tannate stains caused by tap water reacting with wood tannins. Sand the spot lightly with 150-grit paper, apply a saturated solution of oxalic acid (wood bleach) dissolved in warm water, let it dry until the stain lifts, rinse with distilled water, let dry, and reapply your finish.
- Scratches and Knife Gouges: Edge-grain and end-grain surfaces can be renewed simply by sanding the affected area with progressive grits (120 to 220) and blending a fresh coat of oil or hard-wax into the surrounding wood.
Frequently Asked Questions About Butcher Block Countertops
How do you properly seal butcher block around a sink cutout to stop rot?
Saturate the internal cut edges with at least four coats of a penetrating oil-varnish or marine-grade sealant, letting each coat soak deeply into the end grain before drying. When dropping in the sink, run a generous bead of 100% neutral-cure silicone under the rim. Wipe away excess squeeze-out immediately. Avoid plumber’s putty on wood, as its natural oils can stain the timber.
Can you fix a butcher block countertop that has already warped or cupped?
Yes. First, loosen all cabinet mounting screws underneath to remove structural tension. If the slab cupped upward because the top dried faster than the bottom, moisten clean towels, lay them across the concave areas for several hours, and apply weights across the bow. Once flattened, sand both faces evenly and seal all six sides immediately to lock in balanced moisture levels.
How often should butcher block countertops be oiled after installation?
For mineral oil finishes, follow the standard woodworker’s rule of thumb: apply oil once a day for the first week, once a week for the first month, and once a month thereafter. You can test your surface at any time with the water-bead test: drop a teaspoon of water on the prep surface; if it stays beaded, the finish is intact; if the water spreads out or soaks into the wood within two minutes, it is time for a fresh coat.
Conclusion
Butcher block countertops bring natural character, warmth, and repairability to any kitchen workspace. By respecting the natural physics of wood movement—giving your slab time to acclimate, sealing all six sides evenly, leaving perimeter wall expansion gaps, and using slotted mounting hardware—you ensure your wood counters remain flat, stable, and crack-free for decades.
If you are planning a full kitchen remodel and want to pair the organic warmth of a butcher block island with the durability of natural stone perimeter slabs, explore Global Stone Inc.’s countertop surfaces or visit our Chicago-area showroom in Elk Grove Village to find the perfect stone pairing for your home.