
How to Measure and Install a 36 x 22 Vanity Top
How to Choose and Fit a 36 x 22 Bathroom Vanity Top
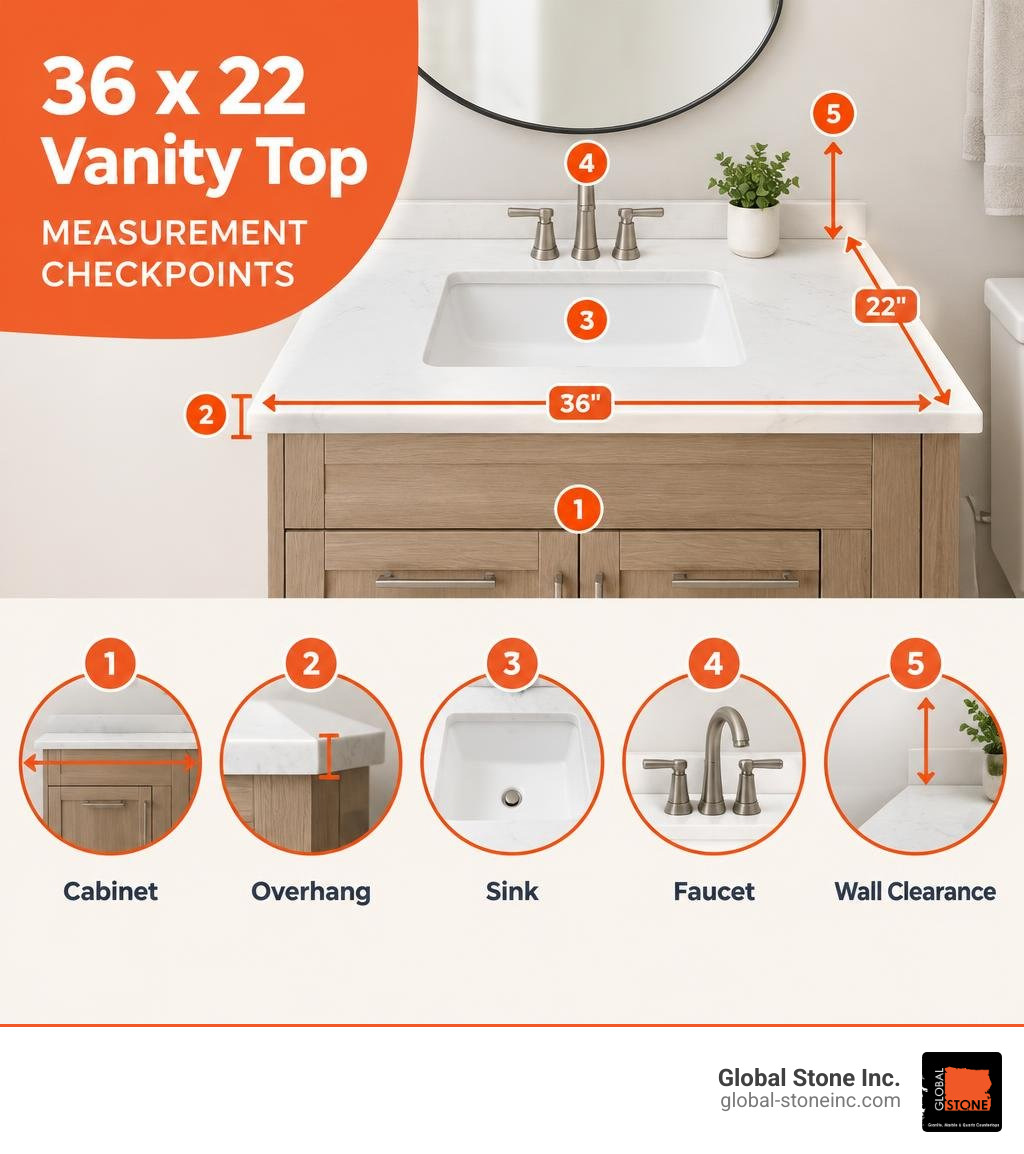
A 36 x 22 bathroom vanity top is 36 inches wide and 22 inches deep. Before buying one, measure the actual width and depth of your cabinet, then check how much the top can overhang at the front and sides. Also confirm that the sink opening lines up with your drain and that the faucet holes match your faucet. Do not assume every top labeled “36-inch” has the same finished width; some are 37 inches wide to overhang a 36-inch cabinet.
I’m Greg Zamarski. At Global Stone Inc., I’ve spent more than 20 years helping Chicago-area homeowners measure, fabricate, and install stone countertops, including the custom-fit details that matter for a 36 x 22 bathroom vanity top.
Related content about 36 x 22 bathroom vanity top:
Choosing the Right 36 x 22 Bathroom Vanity Top: Materials and Sinks
When upgrading a powder room, guest bath, or primary ensuite, a standard 36-inch by 22-inch footprint strikes the sweet spot between ample counter space and efficient room flow. Selecting the right top involves balancing physical durability, maintenance tolerance, aesthetic preferences, and basin style.
| Material | Durability | Stain Resistance | Maintenance Level | Typical Price Range |
|---|---|---|---|---|
| Engineered Quartz | Very High | Excellent (Non-porous) | Very Low (No sealing needed) | $330 – $550 |
| Italian Carrara Marble | Moderate to High | Vulnerable to acids & oils | Medium-High (Requires sealing) | $500 – $680+ |
| Engineered Stone / Marble | High | High (Resin-bound) | Low (Non-porous surface) | $270 – $430 |
Popular Countertop Materials for a 36 x 22 Bathroom Vanity Top
Every bathroom sees its share of toothpaste splatters, soap scum, cosmetics, and standing water. Choosing a resilient surface prevents premature wear and costly replacements. For a deeper breakdown of surface characteristics across different dimensions, explore our material selection guide.
- Quartz: Engineered quartz blends roughly 90% to 93% crushed natural stone crystals with polyester resins and pigments. Tops like pure white quartz or patterns mimicking Calacatta Gold and Carrara veining are impervious to water and makeup stains. With prices generally landing between $330 and $550 for standalone tops (or roughly $980 to $1,040 in complete designer vanity sets), quartz offers exceptional longevity exceeding 20 years without resealing.
- Natural Carrara and Crema Marfil Marble: Natural stone slabs, such as Italian White Carrara or Spanish Crema Marfil, provide unmatched organic beauty. Slabs typically run 0.75-inch (2 cm) to 1.5-inch mitered thicknesses and cost between $540 and $680 for pre-fabricated tops, reaching $950 to $1,030 for full vanity assemblies. Because natural metamorphic limestone is naturally porous, it must be sealed before use to prevent etching from acidic liquids and personal care products.
- Engineered Stone Composite: Often combining pulverized stone with high-grade resins, engineered composites (such as Volakas White, Venice White, or Lightning White) replicate natural veining at approachable price points ($270 to $430). They deliver high impact resistance and uniform coloring.
Sink Styles and Configurations for a 36 x 22 Bathroom Vanity Top
The sink basin style directly influences counter space and daily cleaning:
- Undermount Sinks: Mounted beneath the countertop cutout, rectangular undermount sinks (typically 16 to 18 inches wide by 12 to 14 inches front-to-back) allow you to sweep water and debris directly off the stone surface into the basin. They maximize usable workspace and create clean lines.
- Drop-In and Vessel Sinks: Drop-in basins feature a raised lip that rests over the countertop cutout, offering a traditional profile and simple installation.
- Bowl Placement (Center vs. Offset): While a centered basin is traditional, offset configurations (left or right sink placement) are increasingly popular. Placing the sink on one side reserves an uninterrupted 18-to-20-inch stretch of flat stone countertop on the opposite side for styling tools, toiletries, and vanity trays.
How to Accurately Measure for a 36-Inch Vanity Top
Accurate planning ensures you avoid installation headaches. Read our comprehensive steps on measuring countertop dimensions to verify every clearance point before purchasing your slab.
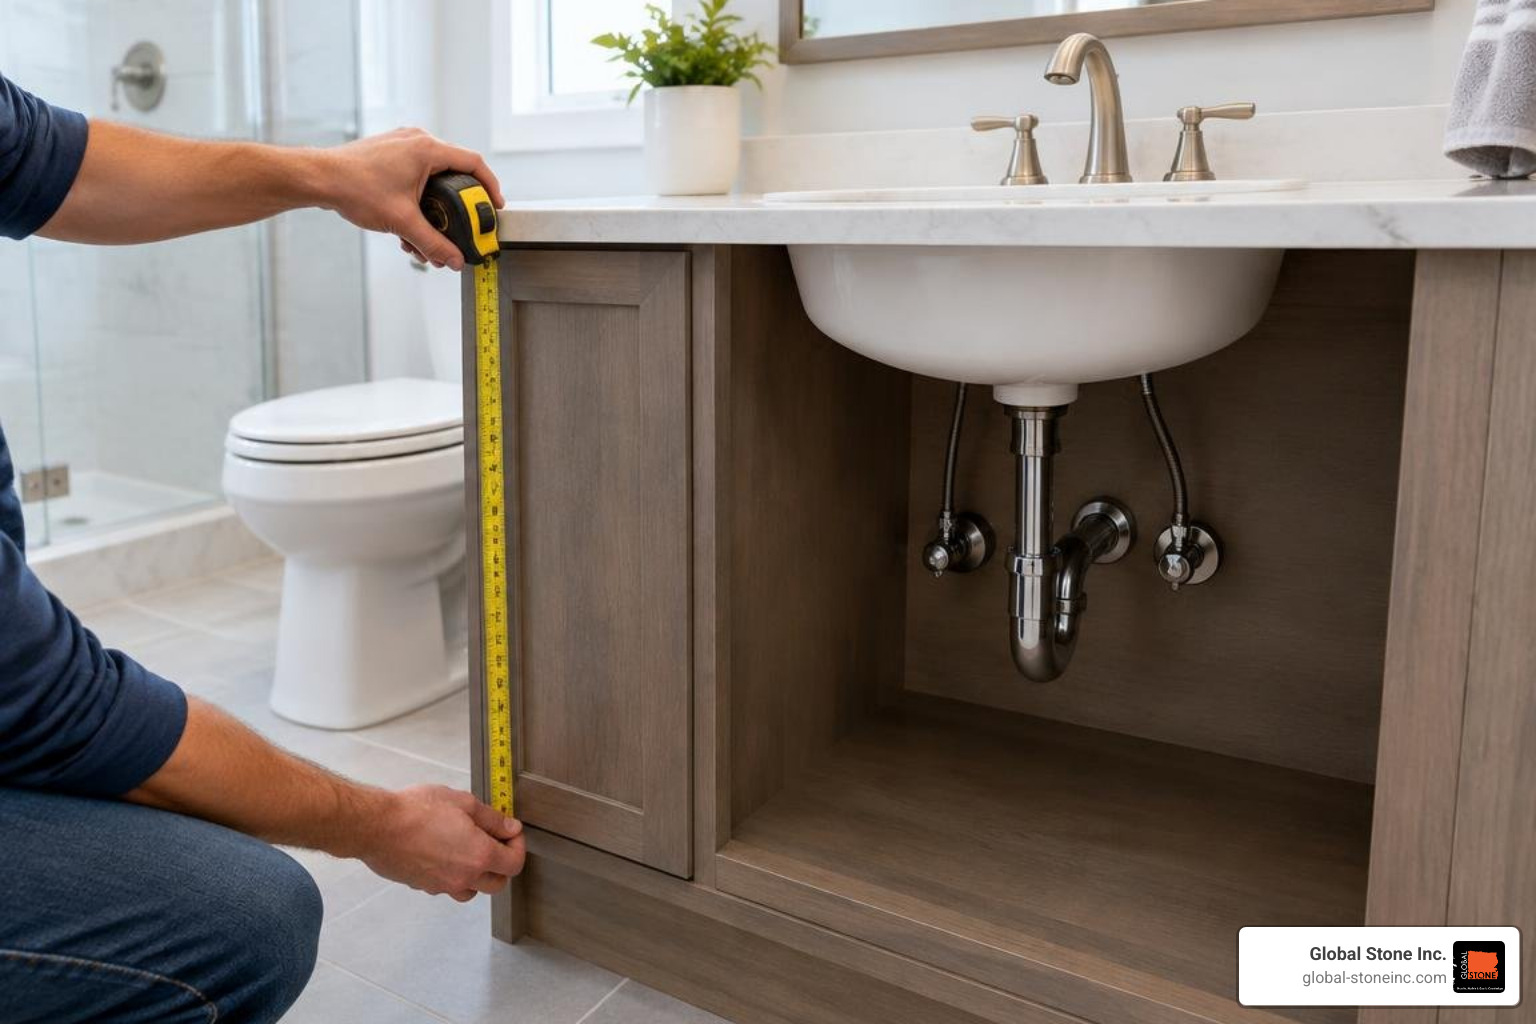
Measuring Cabinet Base, Overhang, and Clearance
Standard bathroom vanity cabinets designed for a 36-inch top generally measure 35 inches to 36 inches in cabinet box width and 21 inches in box depth.
- The Finished Overhang: A functional vanity top should extend 0.5 inches beyond the cabinet face and any exposed side. If your vanity cabinet base is 35 inches wide by 21 inches deep, a 36 x 22 top yields a 0.5-inch overhang on the left, right, and front.
- The 36″ vs. 37″ Sizing Rule: If your cabinet box is exactly 36.0 inches wide by 21.5 inches deep, a 36 x 22 top will sit flush with the sides. If you want a standard 0.5-inch side lip, choose a top designed with 37 x 22 vanity top dimensions.
- Alcove vs. Freestanding Installations: For vanities nestled between two walls (an alcove), measure the wall-to-wall width at the back, front, and countertop height. Walls in older Chicago homes are rarely perfectly square; taking three measurements ensures your top will slide into place without binding or leaving unsightly gaps.
- Clearance Checks: Confirm that your 22-inch finished depth leaves adequate clearance for bathroom doors, shower enclosures, and adjacent linen closet doors to swing open freely.
Checking Plumbing Rough-In and Faucet Spread
Before ordering your top, match your plumbing footprint to the countertop’s cutouts:
- Drain Rough-In: Measure from the finished floor to the center of the drain stub-out in the wall (standard rough-in is 18 to 20 inches high). Ensure your sink basin depth (usually 6.5 to 8 inches) combined with the countertop thickness leaves adequate space for your P-trap assembly.
- Faucet Spreads: Countertops come pre-drilled in three primary configurations:
- Single Hole: Modern single-lever mixers requiring one 1-3/8-inch center hole.
- 4-Inch Centerset: Three holes spaced 2 inches apart across a 4-inch span, common for traditional compact fixtures.
- 8-Inch Widespread: Three distinct holes (hot handle, spout, cold handle) spaced 4 inches apart across an 8-inch spread, providing an open, upscale look.
- Backsplash Clearance: Standard backsplashes are 4 inches high. Ensure your mirror frame, wall-mounted light sconces, or electrical GFCI outlets sit at least 4.5 inches above the cabinet top.
Step-by-Step Installation Guide for a 36×22 Vanity Top
Installing a 36-inch vanity top is manageable with the right tools, careful dry fitting, and proper adhesives. If you prefer turnkey service, you can learn more about professional vanity countertop installation handled by our in-house team.
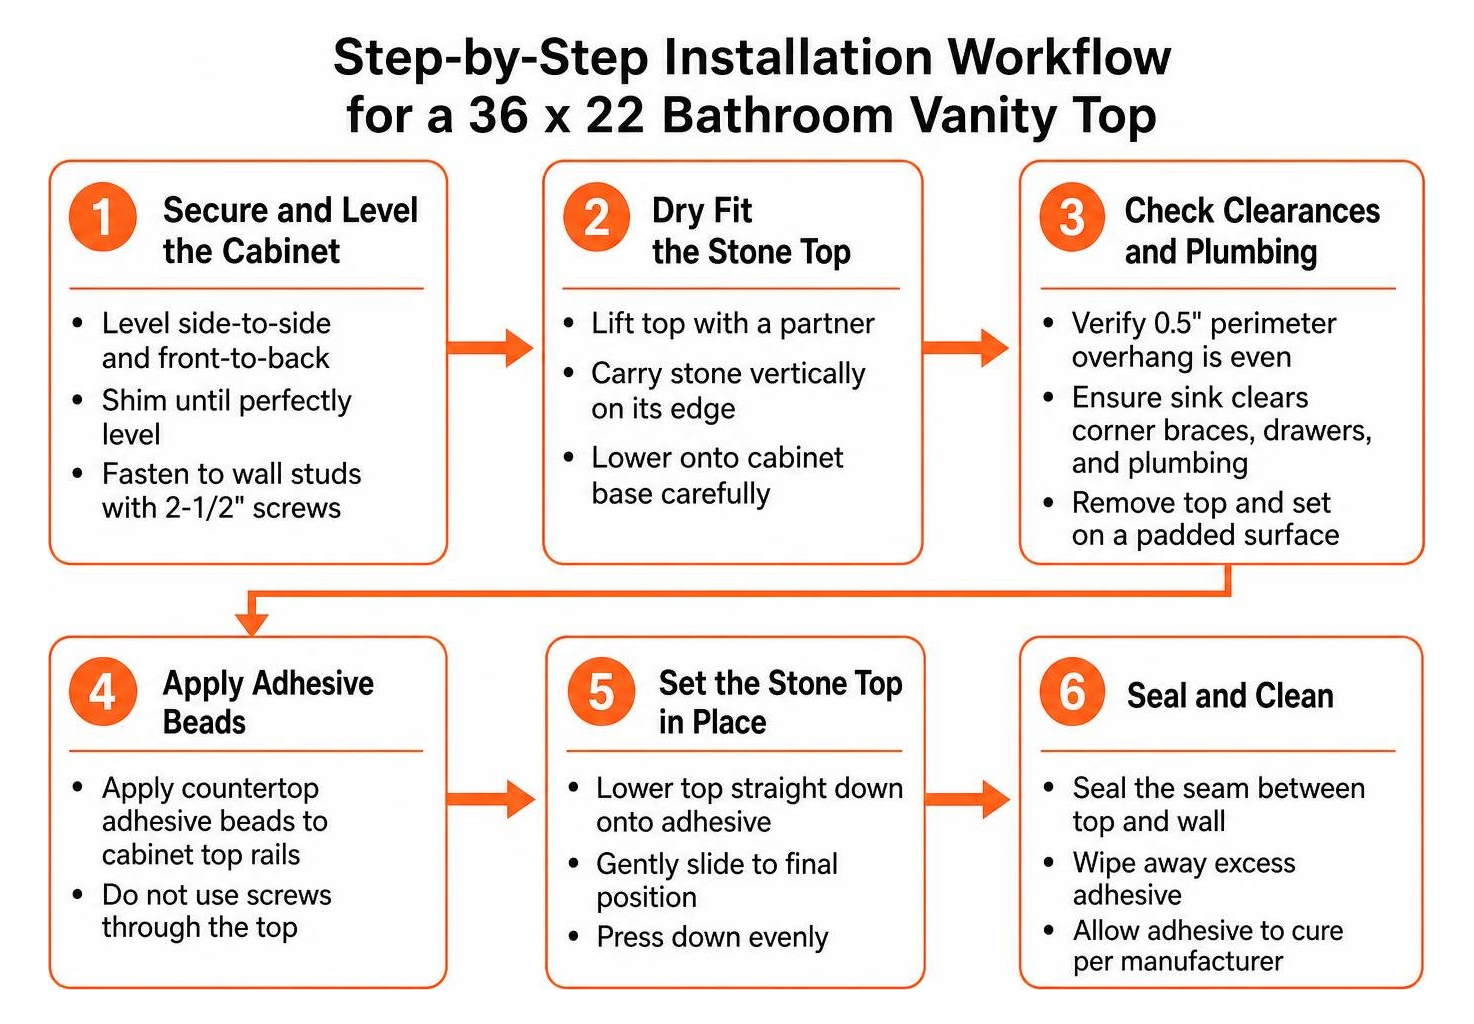
Dry Fitting and Leveling the Cabinet Base
- Secure and Level the Cabinet: Place a 2-foot or 4-foot bubble level across the top edges of the vanity base (side-to-side and front-to-back). Place composite or hardwood shims underneath the cabinet base until the cabinet is perfectly level. Fasten the cabinet into the wall studs using 2-1/2-inch cabinet screws through the rear mounting rail.
- Dry Fit the Stone Top: Carefully lift the stone top with a partner—always carrying natural stone vertically on its edge, never flat, to prevent snapping across the sink cutout. Lower it onto the cabinet base.
- Check Clearances and Plumbing: Check that the 0.5-inch perimeter overhang is even across the front and exposed sides. Verify that the sink basin clears the cabinet internal corner braces, drawer boxes, and rear plumbing supply lines. Remove the top and set it safely aside on a padded surface.
Securing the Vanity Top, Sink, and Backsplash
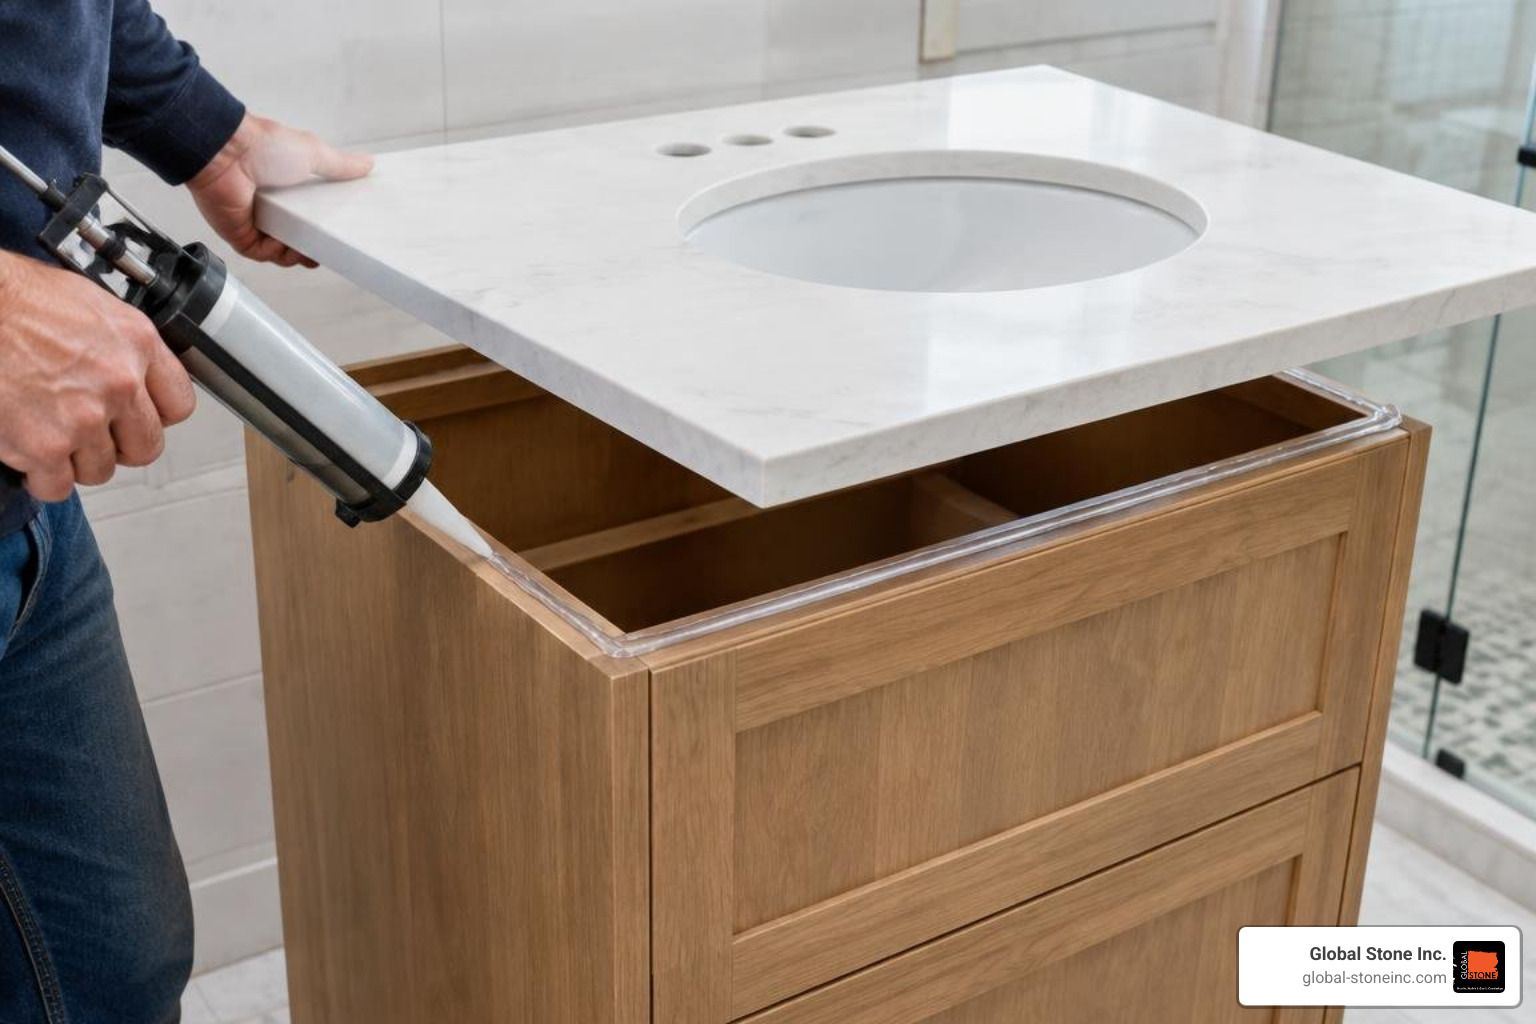
- Mount the Faucet Hardware First: It is far easier to install the faucet spout, handles, and pop-up drain assembly onto the stone top before the top is permanently attached to the cabinet.
- Apply Adhesive: Clean the top perimeter edges of the wooden cabinet frame with rubbing alcohol. Apply continuous, dime-sized beads of 100% neutral-cure silicone adhesive along the top corners and perimeter rails of the cabinet.
- Set the Vanity Top: Lower the stone top onto the vanity cabinet, aligning your overhang reveal carefully. Press down firmly to seat the silicone.
- Install Backsplash and Side Splashes: Clean the wall surface behind the counter. Run a serpentine bead of silicone along the back of the 4-inch backsplash panel, press it firmly against the drywall, and apply a thin bead along the joint where the backsplash meets the countertop. Repeat for any side splashes against adjacent side walls.
- Connect Plumbing: Reattach the hot and cold braided stainless water supply lines to your faucet shanks, install the pop-up drain body with plumber’s putty or silicone gaskets, and connect the sink tailpiece to the P-trap. Run the water for 2 to 3 minutes to test all connections under full pressure.
Maintenance, Sealing, and Care by Material
To preserve the appearance and longevity of your countertop, tailor your maintenance routine to the specific stone surface:
- Natural Stone Sealing (Carrara, Crema Marfil, Granite): Natural stones should be sealed upon initial installation and resealed every 6 to 12 months. Apply a quality solvent-based penetrating stone impregnator, allow it to soak into the pores for 10 to 15 minutes, and wipe away all excess haze with a clean microfiber cloth. Perform the “water drop test”: if a bead of water darkens the stone or flattens within 5 minutes, it is time to reseal.
- Daily Cleaning Protocol: Wipe stone surfaces daily using a soft, lint-free cloth dampened with warm water and a pH-neutral cleaner. Avoid harsh cleansers containing bleach, ammonia, vinegar, citrus, or abrasive scouring powders, which will etch marble surfaces and degrade silicone sealants. For safe cleaning guidelines, consult the Natural Stone Institute recommendations on natural stone care.
- Protecting Engineered Quartz: While quartz does not require liquid sealers, it is sensitive to concentrated heat (above 300°F). Always rest curling irons, straighteners, and hot styling tools on heat-resistant silicone mats to prevent thermal discoloration of the bonding resin.
- Caulk Joint Maintenance: Inspect the silicone caulk line along the backsplash and sink rim annually. If the caulk shrinks, discolors, or separates, peel away the old material and apply a fresh bead of mold-and-mildew-resistant kitchen and bath silicone.
Frequently Asked Questions about 36 x 22 Vanity Tops
What size cabinet base is needed for a 36 x 22 vanity top?
A standard 36 x 22 vanity top is designed for a cabinet base measuring 35 inches wide by 21 inches deep (to provide a standard 0.5-inch overhang on the front, left, and right sides) or a 36-inch wide by 21-inch deep base when installed flush between walls in an alcove configuration. Always measure your cabinet box’s outer dimensions rather than relying on manufacturer nominal size tags.
Does a natural marble vanity top require sealing prior to use?
Yes. Natural Carrara and Crema Marfil marble are porous metamorphic stones formed from recrystallized limestone. They readily absorb liquids, oils, and pigmented cosmetic residues if left unsealed. Apply an impregnating stone sealer immediately after unboxing and dry fitting, prior to regular daily use, and reapply annually.
What is the difference between a 36×22 and a 37×22 vanity top?
A 36 x 22 top measures exactly 36.0 inches in total width, making it ideal for 35-inch cabinets with standard overhangs or 36-inch alcove installations. A 37 x 22 top measures 37.0 inches wide and is purpose-built for freestanding 36.0-inch cabinet boxes, providing an even 0.5-inch overhang on both exposed sides.
Conclusion
A 36 x 22 bathroom vanity top provides an ideal blend of workspace, storage capacity, and clean aesthetics for any bathroom renovation. By carefully measuring your cabinet box dimensions, verifying plumbing rough-ins, choosing a resilient stone surface, and following sound installation practices, you can enjoy a durable, beautiful vanity for decades to come.
If you are planning a bathroom remodel in the greater Chicago area—including Elk Grove Village, Naperville, and surrounding communities—our team at Global Stone Inc. brings over two decades of fabrication and installation expertise to every project. We handle the entire process in-house, backed by our lifetime warranty. Contact our design specialists today to explore our custom stone countertop solutions and find the perfect stone slab for your home.